Advanced Animation Techniques in Alight Motion - Complete Guide to Keyframes, Velocity & Motion Blur
Master professional animation techniques including keyframes, velocity presets, motion blur effects, 3D rotation, and cinematic animation tricks for mobile video editing
- Introduction
- Why Use Alight Motion for Animation?
- Key Features for Advanced Animators
- Step-by-Step Guide to Advanced Animation
- Advanced Animation Techniques Explained
- Tips for Professional Animation
- Common Mistakes & How to Fix Them
- Best Alternatives to Alight Motion
- FAQs
- Conclusion + Call-to-Action
Animation has become a cornerstone of modern digital content creation, transforming static visuals into dynamic, engaging experiences. Whether you're creating social media content, marketing videos, or cinematic shorts, advanced animation techniques in Alight Motion can elevate your projects to professional levels. This comprehensive Alight Motion advanced animation tutorial will guide you through sophisticated techniques that will help you master keyframe animation, velocity presets, and motion blur effects for truly cinematic results.
In today's competitive digital landscape, content creators need every advantage to stand out. Advanced animation techniques in Alight Motion provide that edge, allowing you to create professional-quality animations that rival desktop software results. From parallax scrolling effects to 3D rotation animations and character lip-sync, this guide covers everything you need to know to become an expert animator using mobile technology.
Professional animators understand that the difference between amateur and expert work lies not just in the tools, but in the mastery of advanced techniques that bring life and emotion to every frame.
Introduction: The Power of Advanced Animation in Modern Video Editing
In today's content-saturated digital landscape, viewers have become increasingly sophisticated, demanding more than static images or simple transitions. Advanced animation techniques in Alight Motion allow creators to craft compelling narratives through movement, timing, and visual storytelling. These techniques transform ordinary videos into memorable experiences that captivate audiences and drive engagement.
The evolution of mobile editing has democratized professional animation tools, making sophisticated techniques accessible to creators worldwide. With Alight Motion, you can achieve results that previously required expensive desktop software and extensive training. This guide will explore how to leverage these capabilities to create animations that stand out in crowded digital spaces.
From social media posts that stop the scroll to cinematic shorts that tell powerful stories, advanced animation techniques are essential for modern content creators. Understanding how to implement these techniques effectively can be the difference between content that gets ignored and content that goes viral.
Whether you're a social media influencer looking to create engaging content, a marketer wanting to make your brand stand out, or an aspiring filmmaker exploring mobile animation possibilities, mastering advanced animation techniques in Alight Motion will give you the skills needed to create professional-quality content that resonates with your audience.
Why Use Alight Motion for Animation?
Alight Motion stands out in the mobile editing landscape for several compelling reasons. Unlike basic video editors, Alight Motion offers a robust animation timeline with precise keyframe controls, professional-grade effects, and a layer-based approach that gives creators complete control over their animations.
One of the primary advantages of using Alight Motion for animation is its intuitive interface combined with professional features. You don't need to be a technical expert to create sophisticated animations, but the software provides the depth needed for complex projects. The app supports multiple layers, advanced blending modes, and real-time previews that make experimentation and iteration seamless.
Additionally, Alight Motion's mobile-first design means you can create professional animations anywhere, without being tied to a desktop computer. This flexibility is invaluable for creators who travel frequently or prefer to work on-the-go. The app's performance optimization ensures smooth operation even on mobile devices, making it a powerful tool for serious animators.
Key Features for Advanced Animators in Alight Motion
Alight Motion provides a comprehensive suite of tools specifically designed for advanced animators. These features work together to create a professional animation environment on mobile devices, offering capabilities that rival desktop software.
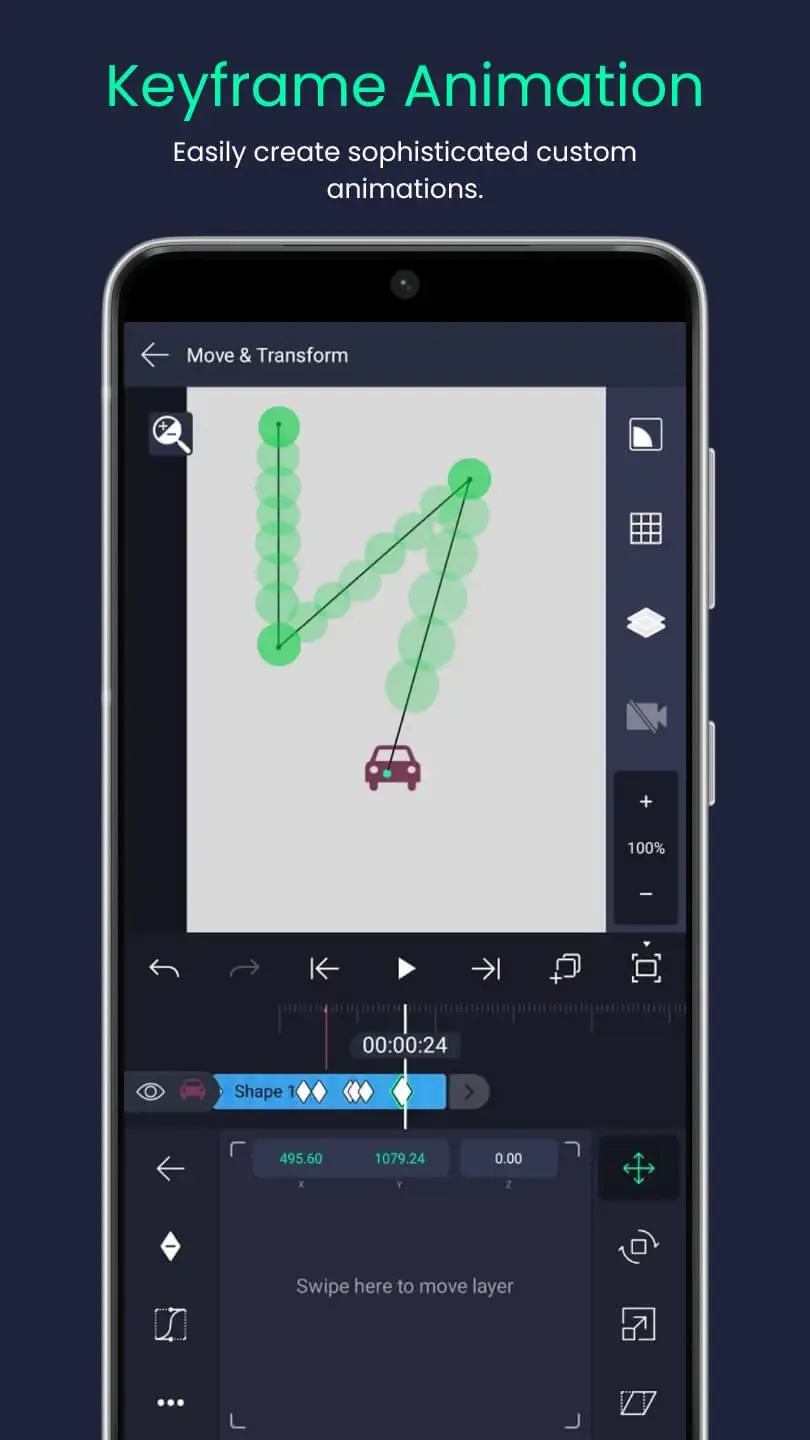
Keyframe Animation
At the heart of professional animation in Alight Motion is the keyframe system. Keyframes allow you to define specific values for properties at different points in time, with the software automatically interpolating the values between keyframes to create smooth motion.
Alight Motion's keyframe editor provides precise control over position, scale, rotation, opacity, and other properties. You can adjust easing curves to create natural acceleration and deceleration, and use the graph editor to fine-tune animation timing. This level of control is essential for creating animations that feel organic and professional.
Keyframe animation is the foundation of all professional animation. Master this technique, and you'll have the power to bring any object to life with precise control over timing and movement.
Advanced animators can take advantage of features like keyframe interpolation modes, which allow you to choose between linear, bezier, and hold interpolation for different effects. The ability to copy and paste keyframes between layers or projects significantly speeds up workflow for complex animations.
For best results with keyframe animation, always start with the main poses or key positions, then add intermediate keyframes for smoother motion. Use the graph editor to fine-tune easing curves and create natural-looking acceleration and deceleration that mimics real-world physics.
Velocity & Time Remapping
Velocity presets in Alight Motion are pre-defined motion curves that add professional polish to animations. These presets simulate natural movement patterns, such as ease-in, ease-out, bounce, and overshoot, without requiring manual keyframe adjustment.
Time remapping allows you to control the speed of your animation over time, creating dramatic slow-motion effects or fast-paced sequences. This feature is particularly powerful when combined with keyframe animation, as it gives you complete control over the pacing and rhythm of your animations.
Velocity presets are like having a professional animator's timing instincts built into your software. They instantly transform mechanical movements into natural, engaging animations that feel alive and responsive.
Professional animators often use velocity presets to add subtle timing variations that make animations feel more natural. The difference between a mechanical animation and a lifelike one often comes down to these small timing adjustments that velocity presets make easy to implement.
For more detailed information on velocity presets and time remapping, check out our comprehensive guide on Time Remap in Alight Motion Velocity Preset, which covers advanced techniques and creative applications.
Motion Blur & Easing Effects
Motion blur is a crucial effect for creating realistic animations, especially at higher frame rates. Alight Motion's motion blur system simulates the natural blur that occurs when objects move quickly, adding a cinematic quality to your animations.
Easing effects control how animations accelerate and decelerate, making movements feel more natural. Alight Motion provides a variety of easing presets, from simple ease-in and ease-out to complex bounce and elastic effects. These presets can be applied to individual keyframes or entire animation sequences.
Motion blur is the secret ingredient that separates amateur animations from professional ones. It adds the subtle realism that makes viewers believe your animations are real, not just digital creations.
Understanding how to use motion blur and easing effects together is key to creating professional animations. Motion blur adds visual continuity to fast movements, while easing effects ensure that animations start and stop naturally, avoiding the mechanical feel of linear motion.
When working with motion blur, remember that less is often more. Subtle motion blur creates realistic movement, while excessive blur can make animations look blurry and unprofessional. Experiment with different blur intensities to find the perfect balance for your specific animation style.
Vector Graphics & Custom Shapes
Alight Motion's vector graphics capabilities allow you to create scalable animations that maintain quality at any resolution. This is particularly important for animations that need to be exported at different sizes or displayed on various devices.
The custom shapes tool enables you to create unique geometric forms and paths for animation. You can animate these shapes by modifying their properties over time, creating morphing effects, growing lines, and complex geometric animations that would be difficult to achieve with raster graphics.
Vector graphics are the animator's best friend for creating scalable, crisp animations that look perfect on any device. They give you the freedom to create complex geometric patterns and organic shapes that can be animated with precision.
Vector animations are also more efficient in terms of file size and processing power, making them ideal for mobile devices. This efficiency becomes particularly important when working with complex animations that include multiple layers and effects.
Use vector graphics to create logos, icons, and geometric patterns that can be animated smoothly. The ability to scale these elements without quality loss makes them perfect for responsive design and multi-platform content creation.
Step-by-Step Guide to Advanced Animation in Alight Motion
Creating advanced animations in Alight Motion follows a structured process that ensures professional results. This step-by-step guide will walk you through the entire workflow, from project setup to final export.
Step 1: Create a New Project
- Open Alight Motion and tap the + button to create a new project.
- Set project dimensions that match your intended output (1080x1920 for vertical videos, 1920x1080 for horizontal).
- Choose frame rate - 30fps for standard content, 60fps for smoother animations.
- Set duration for your animation timeline (you can extend this later if needed).
Proper project setup is crucial for achieving the best results. Starting with the correct dimensions and frame rate prevents quality loss during export and ensures your animations look professional on all devices.
Pro Tip: Always start with a higher frame rate (60fps) for smooth animations, even if you plan to export at 30fps. This gives you more flexibility for slow-motion effects and ensures the smoothest possible motion.
Step 2: Add Layers (Text, Shapes, Images)
- Import media by tapping the + button and selecting from your device or cloud storage.
- Add text layers using the text tool, choosing fonts that complement your animation style.
- Create shapes using the vector tools for geometric elements and custom graphics.
- Organize layers in the timeline, arranging them in the correct stacking order.
Layer organization is critical for complex animations. Name your layers clearly and group related elements to maintain control over your project as it grows in complexity.
Step 3: Use Keyframes for Smooth Animation
- Select a layer in the timeline and tap the keyframe button for the property you want to animate.
- Set initial values at the start of your animation timeline.
- Move the playhead to a later point and adjust the property values to create your animation.
- Refine easing using the graph editor to adjust acceleration and deceleration.
Effective keyframe animation requires understanding the principles of timing and spacing. Professional animators often plan their keyframes before implementation, sketching out the major movements and transitions to ensure smooth, purposeful animation.
Animation Tip: Use the "ease in" and "ease out" principles for natural movement. Objects should start slowly, accelerate in the middle, and slow down at the end, just like real-world physics.
Step 4: Apply Velocity Presets for Dynamic Motion
- Select animated properties in the timeline that you want to enhance with velocity presets.
- Open the velocity menu and browse available presets or import custom ones.
- Apply presets to individual keyframes or entire animation sequences.
- Adjust intensity to match the desired level of motion dynamics.
Velocity presets can dramatically improve the natural feel of your animations. Experiment with different presets to find the ones that best match your animation style and content requirements.
Pro Tip: Combine multiple velocity presets for complex animations. Use one preset for the main movement and another for secondary elements to create layered, dynamic motion that feels organic and engaging.
Step 5: Add Effects & Motion Blur
- Apply visual effects from the effects library to enhance your animations.
- Enable motion blur in the project settings for realistic movement blur.
- Adjust effect parameters to match the intensity and style of your animation.
- Preview results to ensure effects enhance rather than distract from your animation.
Effects should support your animation narrative rather than overwhelm it. Use effects sparingly and purposefully, ensuring they contribute to the overall visual story you're telling.
Effects Tip: Layer your effects strategically - start with basic motion blur, then add subtle visual enhancements. Remember, the best effects are often the ones viewers don't notice but would miss if removed.
Step 6: Export in High Quality
- Review your animation multiple times to catch any issues or areas for improvement.
- Adjust export settings to match your intended platform and quality requirements.
- Choose appropriate codec and bitrate for optimal file size and quality balance.
- Export and test the final video to ensure it meets your standards.
Export settings significantly impact the final quality of your animations. Take time to understand the requirements of your target platforms to ensure optimal presentation of your work.
Export Tip: For social media, use H.264 codec with a bitrate of 8-12 Mbps for optimal quality and file size. For professional work, consider ProRes or DNxHD for maximum quality preservation.
Advanced Animation Techniques Explained
Beyond the basic animation workflow, Alight Motion offers sophisticated techniques that can elevate your animations to professional levels. These advanced methods require practice and experimentation but can produce stunning results.
Parallax Effect Animation
The parallax effect creates a sense of depth by moving background elements at different speeds than foreground elements. This technique simulates the way objects appear to move at different rates when viewed from a moving perspective.
To create a parallax effect in Alight Motion:
- Layer your elements with backgrounds at the bottom and foreground elements at the top.
- Animate each layer with different speeds - background layers move slower than foreground layers.
- Use anchor points to control the center of movement for more natural parallax effects.
- Add camera movement to enhance the depth effect with zooming or panning.
Parallax Tip: Start with a simple 2-3 layer setup before attempting complex multi-layer parallax. The key is subtle movement - too much separation between layers can make the effect look artificial rather than natural.
Parallax effects are particularly effective for title sequences, infographic animations, and storytelling sequences where you want to create a sense of immersion and depth.
3D Rotation & Layer Depth
While Alight Motion is primarily a 2D animation tool, it offers pseudo-3D effects through layer rotation and perspective manipulation. These techniques can create convincing three-dimensional animations without requiring specialized 3D software.
Key techniques for 3D-like animations:
- Use rotation properties on multiple axes to create complex 3D-like movements.
- Adjust anchor points to control the center of rotation for realistic 3D effects.
- Combine with scaling to simulate perspective changes as objects move closer or farther away.
- Add shadows and highlights to enhance the 3D illusion through lighting effects.
3D Tip: Use subtle rotations (5-15 degrees) for realistic 3D effects. Over-rotation can make animations look disorienting rather than impressive. Combine with subtle scaling to enhance the depth illusion.
These techniques are especially useful for product showcases, logo animations, and interface mockups where you want to add dimensionality to flat designs.
Lip-Sync & Character Animation
Lip-sync animation involves matching character mouth movements to audio dialogue. While complex in traditional animation, Alight Motion provides tools that make this technique more accessible to mobile animators.
Steps for basic lip-sync animation:
- Create mouth shapes for different phonemes using vector graphics or image layers.
- Import your audio and use the waveform display to identify dialogue timing.
- Switch mouth shapes at appropriate intervals to match the spoken sounds.
- Add secondary animations like blinking or head movements for more lifelike characters.
[Insert example of lip-sync animation in Alight Motion here]
Character animation in Alight Motion works best with stylized characters that require fewer mouth shapes. Focus on the most important phonemes and use exaggeration to make the animation clear and engaging.
Glitch & VFX Style Animations
Glitch and VFX animations have become increasingly popular in modern digital content. Alight Motion's effects library includes tools specifically designed for creating these trendy visual styles.
Creating glitch effects:
- Use distortion effects to create data corruption and signal interference visuals.
- Apply RGB split effects to separate color channels for classic glitch aesthetics.
- Animate effect parameters to create dynamic, evolving glitch sequences.
- Combine with timing variations for unpredictable, organic glitch behavior.
[Insert example of glitch animation in Alight Motion here]
VFX animations benefit from experimentation and randomness. Don't be afraid to push effects to extreme settings and combine multiple effects for unique results.
Tips for Professional Animation in Alight Motion
Mastering advanced animation techniques requires more than just knowing the tools. These professional tips will help you create animations that stand out and achieve your creative vision.
- Plan your animations with storyboards or sketches before starting in Alight Motion to save time and ensure coherent results.
- Study real-world motion by observing how objects move in nature to create more believable animations.
- Use reference videos when animating complex movements to ensure accuracy and natural timing.
- Master the graph editor for precise control over animation curves and timing variations.
- Organize your layers with clear naming conventions to maintain control over complex projects.
- Save frequently and use version control to protect your work from unexpected crashes.
- Preview regularly to catch issues early and maintain perspective on your animation's progress.
- Learn keyboard shortcuts to speed up your workflow and maintain creative flow.
Professional animators also emphasize the importance of subtlety. Small adjustments to timing, spacing, and easing often have a bigger impact than dramatic changes. Focus on refining your animations through iteration rather than trying to perfect them in one pass.
Common Mistakes in Animation & How to Fix Them
Even experienced animators make common mistakes that can detract from their work. Recognizing these pitfalls and knowing how to correct them will significantly improve your animations.
| Mistake | Problem | Solution |
|---|---|---|
| Over-animation | Too many moving elements create visual chaos | Focus on one main action per scene, use secondary animations sparingly |
| Mechanical timing | Linear movements look unnatural and robotic | Apply easing effects and velocity presets for natural acceleration |
| Inconsistent frame rates | Jittery animations due to timing issues | Set consistent project frame rate and maintain timing discipline |
| Poor layer organization | Difficulty managing complex animations | Name layers clearly and group related elements for better control |
| Ignoring motion blur | Fast movements appear choppy and unrealistic | Enable motion blur for fast-moving elements and adjust intensity |
| Wrong export settings | Quality loss or excessive file sizes | Match export settings to target platform requirements |
Prevention is often better than correction. Develop good habits early, such as regularly previewing your work and saving versions throughout the animation process. This approach helps you catch mistakes before they become deeply embedded in your project.
Best Alternatives to Alight Motion for Advanced Animation
While Alight Motion is an excellent choice for mobile animation, other tools may better suit specific needs or workflows. Understanding the alternatives helps you choose the right tool for each project.
| Software | Strengths | Best For |
|---|---|---|
| Adobe After Effects | Industry-standard features, extensive plugin ecosystem | Professional studios, complex VFX, team collaboration |
| Apple Motion | Seamless integration with Final Cut Pro, intuitive interface | Mac users, quick turnaround projects, template creation |
| Blender | Free, powerful 3D capabilities, robust animation tools | 3D animation, open-source workflows, budget-conscious creators |
| Cinema 4D | Professional 3D animation, motion graphics focus | High-end motion graphics, 3D product visualization |
| Toon Boom Harmony | Traditional animation tools, industry-standard for cartoons | Character animation, traditional 2D animation, broadcast content |
Each alternative has its own learning curve and system requirements. Alight Motion's advantage lies in its accessibility and mobile-first design, making it ideal for creators who need professional animation capabilities without the complexity or cost of desktop software.
Ready to Master Advanced Animation?
Download Alight Motion Premium to access all advanced animation features without watermarks or limitations. Start creating professional animations today!
FAQs – Advanced Animation Techniques in Alight Motion
To create smooth animations in Alight Motion, use keyframes with proper easing, apply velocity presets for natural motion, and add motion blur for realistic movement. Ensure your project settings match your export resolution for best quality.
The best advanced animation effects in Alight Motion include parallax scrolling, 3D rotation with layer depth, velocity presets for dynamic motion, glitch effects, and character animation with lip-sync capabilities.
Alight Motion supports pseudo-3D animation through layer rotation, perspective effects, and depth simulation. While not true 3D like dedicated software, it offers impressive 3D-like effects for mobile editing.
Velocity presets in Alight Motion allow you to apply professional-grade motion curves to your animations. Import community presets or create custom ones to add natural acceleration and deceleration to movements.
Basic animation in Alight Motion involves simple position and scale changes. Advanced animation includes complex keyframe interpolation, velocity curves, motion blur, 3D effects, particle systems, and combining multiple animation techniques for cinematic results.
Yes, Alight Motion supports high-quality exports up to 4K resolution. For best results, match your project settings to your export resolution, use high-bitrate settings, and enable motion blur for smooth animations.
Conclusion + Call-to-Action
Mastering advanced animation techniques in Alight Motion opens up a world of creative possibilities for mobile content creators. From keyframe animation to velocity presets and motion blur effects, the tools and techniques covered in this guide provide a solid foundation for creating professional-quality animations on your mobile device.
The key to success lies not just in understanding the features, but in practicing and experimenting with different combinations of techniques. Animation is both a technical skill and an art form, requiring patience, creativity, and attention to detail. As you continue to develop your skills, you'll find that the limitations of mobile editing become less important than the power of your creative vision.
Remember that professional animation is about storytelling as much as technical execution. The most impressive animations are those that serve the narrative and enhance the viewer's experience rather than simply showing off technical prowess. Focus on creating animations that communicate your message effectively and engage your audience emotionally.
Ready to take your animation skills to the next level? Download Alight Motion Premium today to access all advanced features without watermarks or limitations. With practice and persistence, you'll be creating animations that rival those produced by desktop software, all from the convenience of your mobile device.
For more animation tutorials and tips, explore our other guides on Time Remap Alight Motion Velocity Preset, How to Use Alight Motion Fonts, and How to Use Presets in AlightMotion. Continue learning and experimenting, and you'll soon develop your own signature animation style that sets your content apart from the crowd.
Further reading: Learn about animation principles on Wikipedia. Official Alight Motion information at alightmotion.com.
📚 Educational Disclaimer
This guide is for educational purposes only. We are not affiliated with Alight Motion or its developers. This tutorial demonstrates advanced animation techniques that can be applied to various video editing software. For official Alight Motion support and updates, visit alightmotion.com.
Related tutorials: How to Add Audio to Alight Motion, How to Reverse Video in Alight Motion, Alight Motion Pro APK Download